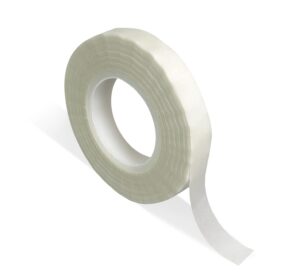
To cut double-sided tape cleanly without sticking, keep the protective backing on and slice in a single forward stroke using an oiled utility blade or non-stick craft scissors. Thin paper tape cuts in under two seconds with shears, while thick mounting tape requires a firm, guided utility knife pass.
8 Best Scissors For Cutting Double Sided Tape: Mess-Free Cuts
What You Need Before Cutting
Having the proper tools nearby keeps the adhesive from grabbing your fingers, tearing the liner, or gumming up your blades.
- A utility knife with a fresh, sharp blade or non-stick craft scissors
- A metal straightedge or steel ruler (plastic rulers chip and catch blades)
- A self-healing cutting mat, dense scrap wood, or heavy cardboard
- A paper towel lightly dampened with vegetable oil or mineral oil
- Rubbing alcohol (isopropyl alcohol) to clean blades afterward
How to Cut Double-Sided Tape Cleanly
This method prevents sticky buildup, keeps the protective release paper intact, and ensures straight edges across every tape variety.
- Clean and prepare the blade. Wipe a drop of mineral oil or vegetable oil over both sides of your scissor or utility blade using a paper towel. This creates a temporary barrier so sticky synthetic resins can’t cling to the steel surface during the slice.
- Lay the tape flat with the liner down. Unroll the length of tape you need onto a cutting mat without peeling away the slick backing paper. If you’re using pre-sheeted tape, keep the manufacturer’s glossy liner facing down against your cutting mat to protect the exposed adhesive side.
- Measure and mark the cut line. Use a pencil or fine-tip pen on the backing liner to mark your desired length, or align the tape directly against the grid lines of your cutting mat. Don’t use your fingernails to mark the line, as pinching compresses the core and squeezes sticky resin out the sides.
- Anchor the cut path with a metal ruler. Press a steel ruler firmly along the mark across the tape width to hold the strip completely flat against the mat. If your fingers touch the edges of heavy foam tape during this step, grip only the dry outer edges to avoid transferring skin oils onto the adhesive.
- Slice through in one continuous motion. Draw your utility knife along the metal edge at a 45-degree angle, applying steady, downward pressure so you sever the top face, the core, and the bottom liner in a single stroke. If you’re using scissors instead of a knife, open the shears wide and cut near the hinge rather than the tip for maximum mechanical leverage.
- Inspect the cut edge. Lift the ruler straight up without sliding it across the fresh cut. If any tiny threads of adhesive bridge the gap, snip them cleanly with the oiled tips of your scissors rather than pulling the two pieces apart with your bare hands.
- Store the roll properly. Fold a tiny corner of the remaining liner backward onto the roll, or place a clean piece of parchment paper over the fresh end. This simple habit keeps the roll ready for your next project without the raw adhesive welding itself to the rest of the spool.
Tip: Wipe your cutting blade with rubbing alcohol every four or five cuts to strip off microscopic adhesive residue before it hardens into stubborn lumps.
Cutting Times and Tool Selection by Tape Type
Different double-sided tapes use distinct internal cores, ranging from tissue paper to dense acrylic foam.
How Long Does It Actually Take to Cut and Apply?
Cutting and applying double-sided tape takes roughly 1 to 2 minutes per mounting strip when you account for measuring, slicing, surface wiping, and peeling the liner.
If you’re mounting long strips along baseboards or large posters, working in manageable sections saves significant time. Cutting pieces longer than 3 feet at once often results in the exposed adhesive curling back onto itself before you can press it against the wall.
Why Does Double-Sided Tape Gum Up Scissors and Blades?
Double-sided tape gums up cutting tools because the adhesive core is formulated to stay permanently viscoelastic, meaning it acts like a thick liquid and a rubbery solid at the exact same time.
A thin, razor-sharp utility knife bypasses this mechanical issue by slicing directly downward through the material rather than crushing it from both sides. When combined with a tiny smear of oil, the blade glides through the core before the polymer chains have time to grab hold of the moving steel.
8 Best Scissors For Cutting Duct Tape: Tested Scissors That Won’t Gunk Up on Duct Tape
Which Household Lubricants Keep Blades from Sticking?
Light mineral oil, vegetable cooking spray, and dry silicone lubricant all prevent double-sided tape from clinging to cutting tools without damaging the tape’s adhesive chemistry.
- Mineral oil or baby oil: The best overall choice for craft blades because it stays wet, wipes off cleanly, and won’t spoil or turn rancid over time.
- Vegetable cooking spray: A fast, convenient alternative found in every kitchen; spray a tiny mist onto a paper towel and wipe the steel lightly.
- Rubbing alcohol: Best used as a cleaner rather than a lubricant to strip away stubborn gunk after you finish your cuts.
- Non-stick cooking oil drops: A single drop spread across the scissor hinge prevents interior bonding when slicing thick mounting tape.
Never use heavy automotive grease, WD-40, or petroleum jelly on your cutting tools.
Handling Different Types of Double-Sided Tape
Different bonding tasks require unique tape constructions, and each material reacts differently beneath a cutting edge.
Thin Film and Paper Tapes
Stationery tapes, scrapbooking runners, and thin office tapes feature a delicate paper or polyester carrier coated on both sides with light acrylic glue. These tapes tear easily if pulled at an angle, so clean cutting requires razor-sharp shears or a quick press against a serrated tape dispenser.
Heavy-Duty Acrylic Foam Tape
Industrial mounting strips, such as 3M VHB tape, feature a continuous core of solid, closed-cell acrylic foam designed to replace mechanical fasteners. These industrial tapes require firm, continuous pressure to cut because the internal foam resists shearing.
Cut acrylic foam with a fresh utility razor blade against a steel ruler. Press downward firmly and pull the knife toward you in a steady line without sawing back and forth.
Clear Gel and Removable Tapes
Clear gel tapes, often marketed as washable or reusable nano tapes, are extremely elastic and stretch significantly when subjected to cutting friction.
Cut stretch-prone gel tape on a firm cutting mat, chilling it if the room is hot. Press a metal straightedge across the cutting line and make one rapid, decisive cut with a razor knife.
Carpet and Mesh Tapes
Double-sided carpet tape incorporates an internal scrim of woven fiberglass, cotton, or synthetic mesh designed to prevent tearing during heavy foot traffic.
Heavy-duty shears with micro-serrated blades work best for carpet tape. The tiny teeth along the scissor edge trap the slippery structural threads, keeping them from sliding forward while the blades close. If you must use a utility knife, angle the blade very low and slice against a wooden backing board to ensure every internal thread is completely severed.
Common Cutting Mistakes and How to Avoid Them
Small errors during the cutting phase can ruin an entire strip of expensive mounting tape or cause your mounted objects to fall later on.
Why Does the Tape Keep Wrinkling and Bunching Up?
Tape wrinkles when you pull or stretch it while slicing, or when you use a dull blade that drags the material forward instead of cutting through it. Stretching double-sided foam and gel tapes during cutting causes them to shrink back after application, pulling away from the wall.
Always rest the tape completely flat against a work surface without tension before cutting. Let the weight of your metal straightedge hold the material in place rather than pinning it down with stretched fingers.
Why Does the Backing Paper Rip Off Unevenly?
The backing liner tears into frustrating slivers when a blade scores the paper without cleanly cutting the adhesive underneath, or when scissors crush the release paper against the sticky core.
Always cut completely through the tape assembly in a single stroke to keep the release paper intact. When peeling the liner later, bend the corner of the tape sharply backward at a 90-degree angle to pop the release paper free from the adhesive edge, rather than picking at it with fingernails.
Why Are the Edges of My Cut Jagged and Sticky?
Jagged edges occur when using a sawing motion or when adhesive buildup on blades catches the tape.
Make your cuts using one decisive, forward motion. If you notice glue accumulating on your blade, stop cutting immediately. Clean the blade with rubbing alcohol, wipe it dry, add a microscopic touch of oil, and resume your work.
Is It Safe to Use Box Cutters on Mounting Tape?
Yes, box cutters and utility knives are safe and effective for cutting mounting tape as long as you keep your non-cutting hand behind the blade and cut against a stable, slip-resistant surface.
Always keep your guiding hand positioned firmly on top of the metal straightedge, pressing straight down into the work table. Keep your fingertips curled inward away from the ruler’s edge so the knife can’t jump the guide.
For high-strength applications where long-term holding power is essential, review the 3M surface preparation guidelines to ensure your clean-cut tape achieves maximum structural adhesion on your target surface.
How to Remove Gunk from Your Cutting Tools
No matter how carefully you work, cutting dozens of tape strips eventually leaves a trace of adhesive on your blades.
Wipe blades with isopropyl alcohol on a cloth. Wipe from the base to the point.
If the adhesive has cured into hard, stubborn lumps, soak the blades in warm soapy water for five minutes, or apply two drops of citrus-based adhesive remover directly to the sticky spots. Let the cleaner sit for two minutes to soften the resins, wipe clean with a cloth, and finish with a quick wipe of dry paper towel to prevent surface corrosion.
Step-by-Step Tape Cutting Scenarios
Tailoring your approach to specific household and workshop tasks ensures professional results every time.
Cutting Small Mounting Squares
For hanging small items, use uniform squares of mounting tape.
- Unroll several inches of tape flat onto your cutting mat without pulling the release liner.
- Align your steel ruler perpendicular to the tape roll and make straight cross-cuts at uniform intervals, creating small squares or rectangles.
- Leave the cut squares resting on their release paper until the exact moment of installation.
- If you need rounded corners to prevent peeling, pick up each square and trim the sharp corners at a 45-degree angle using small, oiled detail scissors.
Slicing Long Strips for Weatherstripping or Baseboards
Applying tape along long surfaces requires straight, continuous lines.
- Measure the entire length of the window frame or trim with a standard measuring tape.
- Unroll the tape directly alongside your target surface, keeping the release paper on the roll.
- Cut the tape approximately one-half inch longer than your target measurement using sharp shears.
- Press the tape firmly onto the installation surface with the release paper still attached to avoid stretching the core.
- Once the strip is seated, trim the excess half-inch flush with your wall using a fresh utility razor held flat against the trim corner.
Trimming Narrow Widths from Wide Rolls
If you need a 1/4-inch strip but only have a 1-inch roll, follow these steps.
- Secure a 6-inch strip of wide tape flat onto your cutting mat, smoothing it out so no air bubbles sit beneath the backing paper.
- Measure your desired 1/4-inch width from the edge using the grid lines on your cutting board.
- Clamp your metal ruler firmly over the tape along the entire 6-inch line.
- Draw a sharp utility knife along the straightedge using light, repeated passes rather than heavy force to ensure the narrow strip doesn’t twist beneath the ruler.
- Peel away the waste strip first, leaving the exact narrow width you need perfectly straight and ready to mount.
Frequently Asked Questions
Can I cut double-sided tape without scissors?
Yes, you can cut double-sided tape cleanly using a fresh utility knife, an art scalpel, or a single-edge razor blade against a flat cutting board. Hold a metal ruler firmly over the cut mark and draw the sharp edge across the tape in one smooth, decisive slice.
Why does my tape curl up right after I cut it?
Double-sided tape curls after cutting because it was stretched under tension while unrolling. Pulling tape off the spool too hard elongates the elastic core. Once cut, the core contracts, causing the strip to curl into an unusable ring.
Does chilling double-sided tape in the freezer make cutting easier?
Yes, placing thick foam or gel tape in the refrigerator or freezer for 15 minutes before cutting temporarily firms up sticky polymer adhesives. Cooling stiffens the internal core, preventing the glue from transferring onto scissors or knife edges while you slice through the strip on your workbench.
Can I tear double-sided tape by hand?
You can tear thin paper-core double-sided tape by hand, but film, foam, and heavy mounting tapes will stretch and ruin the bond line. Hand tearing pulls the liner unevenly, leaving exposed adhesive that loses its grip.
How do I stop double-sided tape from sticking to my fingers while cutting?
Keep the backing paper on until you finish cutting. When handling raw adhesive edges, lightly wet your fingertips with a drop of water or touch the tape only by its non-sticky perimeter to prevent skin oils from weakening the glue.
What is the best angle for cutting thick foam tape with a razor?
Hold your utility razor blade at a 45-degree angle relative to the cutting surface. This angle allows the tip to penetrate the liner while the slanted edge slices cleanly through the core, significantly reducing friction compared to a blunt 90-degree cut.
Final Thoughts
Once your pieces are ready, peel the backing away carefully to keep the adhesive smooth. You’ll find that working slowly prevents the tape from curling or bunching up as you press it into place. Don’t worry if you make a mistake; you can’t always reposition it, but practice makes perfect.