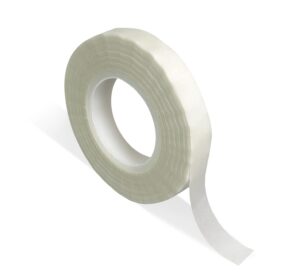
You seal a vapor barrier by pressing butyl or acrylic tape onto clean, dry polyethylene sheets to create an airtight seal. The process works best on dust-free surfaces above 40°F. Overlap seams by at least six inches.
The result depends on tape type, plastic cleanliness, and ambient temperature. We will cover how to check each one so your barrier lasts.
Who needs this guide
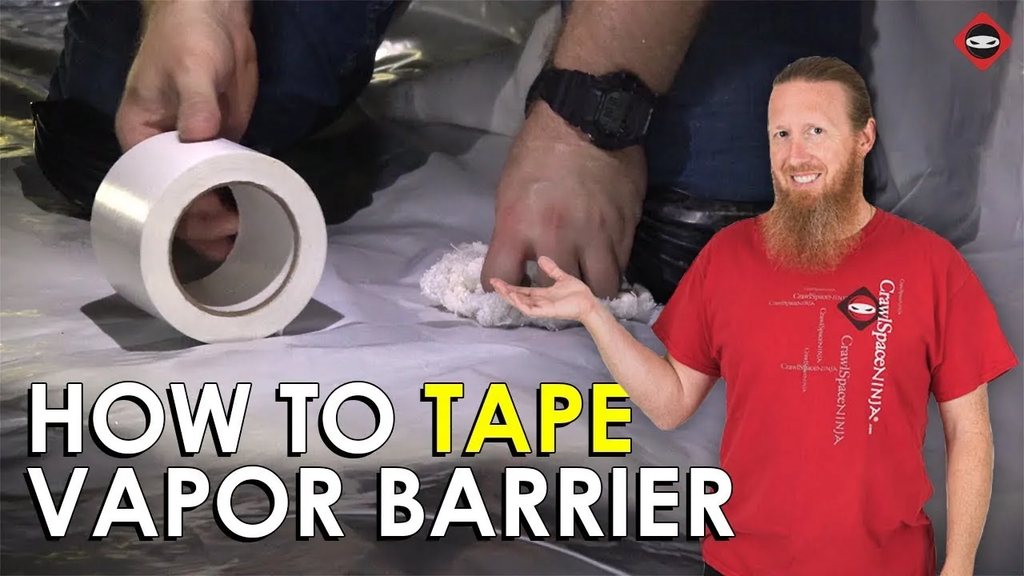
This guide serves homeowners and DIYers who are finishing basements, crawl spaces, or attic floors.
If you’re a professional contractor, you probably already know these basics. This page isn’t for you.
We assume you’re working on interior surfaces in a climate that requires vapor control. You might need a vapor retarder on the outside of the wall instead. Check your local building code to see which side of the wall requires the barrier. This guide focuses on the standard interior application used in most cold-climate homes.
Factors that affect the seal
The type of tape you use matters most. Not all tapes stick to polyethylene. Standard duct tape fails as its adhesive dries out and shrinks. Use tape made for vapor barriers. Look for butyl rubber or acrylic adhesives. These remain flexible and sticky for years.
Surface preparation is the second critical factor. Polyethylene sheets often have slick, oily manufacturing residue. Wipe the area with a clean, dry cloth before taping.
Temperature controls adhesive flow. Most tapes require temperatures above 40°F (4°C) to activate. If you must work in the cold, warm the tape roll in your pocket or a heated room first.
How to apply vapor barrier tape
Prepare the surface thoroughly. Wipe the sheet with a clean, dry rag to remove dust and oils. Smooth wrinkled sheets flat against the framing or insulation.
Slowly pull the backing paper away while pressing the tape down with your other hand. Apply firm, even pressure along the entire length. This ensures the adhesive flows into the plastic’s surface texture.
Fold the excess tape over the edge if you’re sealing around a pipe or wire. Cut slits in the tape to fit around obstacles neatly. Overlap these pieces like shingles to shed any potential moisture. Ensure every part of the tape contacts the plastic or the obstacle tightly. Loose edges will catch air and eventually peel up.
Inspect the seam for any wrinkles, bubbles, or loose edges. Press down firmly on any spots that look raised. The tape should lie completely flat against the plastic. If you see a gap, lift the tape gently and re-stick it. Don’t stretch the tape to cover a gap, as it will snap back.
The key judgment call here is knowing when to replace a piece of tape. If you mess up the alignment, don’t try to stretch it back. Peel it off carefully and start with a fresh piece. Stretching tape creates internal stress that causes it to detach later. It’s better to waste a few inches of tape than to have a failed seal.
We Tested 9 Best Water Activated Tape Dispensers for Reliable Packaging
Common taping scenarios
Different parts of your home require specific approaches.
| Situation | Action | Effort | Watch For |
|---|---|---|---|
| Flat wall seam | Overlap 6 inches, tape center | Low | Dust on plastic |
| Corner joint | Fold tape, press firmly | Medium | Air bubbles in fold |
| Pipe penetration | Cut slits, overlap layers | High | Gaps around pipe |
| Concrete floor edge | Clean concrete, use primer | High | Moisture in concrete |
| Electrical box | Tape around flange | Medium | Sharp edges cutting tape |
Flat wall seams are the easiest. Corners require you to bend the tape, which can create voids if not pressed hard. Concrete edges often need a primer because tape struggles to stick to porous masonry. Electrical boxes have sharp metal edges that can slice through thin tape if you aren’t careful.
Details pros get right
Experienced installers focus on pressure and continuity. Burnishing means rubbing the tape with a tool to force the adhesive into the microscopic pores of the plastic. Run it along the entire length of the tape twice. This removes trapped air and ensures maximum contact.
Another detail is handling overlaps at intersections. When a vertical seam meets a horizontal one, don’t just cross them. Cut the top layer of tape to fit around the underlying strip. This creates a shingle effect that directs any potential moisture away from the joint. It prevents water from getting under the tape if the outer layer fails. This small extra step adds significant durability to the barrier system.
Troubleshooting tape failures
Even with care, issues can arise.
| What you notice | What it usually means | What to do first | How to stop it happening again |
|---|---|---|---|
| Tape peeling at edges | Surface was dirty or oily | Wipe and re-tape | Clean plastic before taping |
| Bubbles under tape | Air trapped during application | Pierce and press flat | Use a roller while applying |
| Tape shrinking back | Tape was stretched during install | Replace with new piece | Cut to length, don’t stretch |
| Adhesive oozing out | Too much pressure or heat | Wipe excess gently | Apply firm, even pressure |
| Tape falling off cold | Temperature too low for adhesive | Warm area and re-apply | Work only above 40°F |
Peeling edges are the most common sign of poor preparation. Slow down and use a tool to push air out. Always let it lie naturally. Oozing adhesive is messy but not always a failure; just clean it up. Cold failure is purely environmental. Wait for warmer weather or heat the space.
Building code requirements
Building codes dictate where and how you must install vapor barriers. In the United States, the International Residential Code (IRC) provides the baseline rules. Section R702.7 specifies vapor retarder requirements based on climate zones. You must check your local adoption of the IRC, as states can modify these rules.
The code generally requires a Class I or II vapor retarder on the interior side of insulation in cold climates. This means the material must have a very low permeance rating. Polyethylene sheeting is a Class I retarder. The code requires seams to be lapped and sealed. While it doesn’t always specify “tape,” using an approved tape is the only way to meet the “sealed” requirement effectively.
Some jurisdictions require specific testing or inspection of the air barrier. If your local inspector checks for air tightness, your taped seams must hold under pressure. Using non-approved tape can fail this test. Always verify with your local building department before starting. They may have additional requirements for fire-rated assemblies or specific products. Ignoring these rules can lead to failed inspections and costly rework.
Cost and time estimates
Taping a vapor barrier is inexpensive but time-consuming. The cost is mostly labor. A roll of quality butyl tape is relatively affordable compared to other materials. You’ll need one roll for every 100 to 150 square feet of wall area, depending on the number of seams. This is a small fraction of the total project cost.
Time varies with complexity. A simple rectangular room takes about 30 minutes to tape. A complex space with many pipes, wires, and corners can take two hours or more. The key is preparation. Cleaning the surfaces takes longer than applying the tape itself. Don’t rush the cleaning. Rushing leads to failures that take much longer to fix.
If you hire a professional, expect to pay for labor hours. Most contractors charge by the hour for this task. It’s rarely a standalone job; it’s part of the insulation or drywall phase. Doing it yourself saves money but requires patience. The materials are cheap, but your time is valuable. Balance speed with quality to get the best result.
Maintaining the barrier
Once installed, the vapor barrier needs little maintenance. However, it’s vulnerable during subsequent construction steps. Drywall installers, electricians, and plumbers often puncture the plastic. Inspect the barrier before closing up the walls. Look for tears, holes, or detached tape.
Repair any damage immediately. Use the same type of tape to patch holes. For large tears, cut a patch of new polyethylene and tape it over the hole. Overlap the patch by at least six inches on all sides. This restores the continuity of the barrier. Don’t leave holes uncovered, even small ones. They allow moist air to enter the wall cavity.
After the walls are closed, you can’t see the barrier. This is why inspection before drywall is critical. Take photos of the taped seams for your records. This helps if you ever need to troubleshoot moisture issues later. There’s no need to check the tape annually unless you suspect a leak. The barrier is a passive system that works silently as long as it remains intact.
When not to use tape
Don’t use tape if the surface is wet. Tape won’t adhere to damp concrete or wet wood. You must dry the area first. Using a heater or dehumidifier may be necessary. Sealing in moisture causes mold growth inside the wall. This is worse than having no barrier at all.
Avoid taping in temperatures below 40°F unless you have specialized cold-weather tape. Standard tapes become brittle and lose stickiness in the cold. If you can’t heat the space, wait for warmer weather. Forcing it will result in failure. Also, don’t use tape on uneven or rough surfaces like bare brick. The tape can’t bridge the gaps. Use a liquid-applied vapor retarder instead for such surfaces.
Frequently asked questions
Can I use duct tape?
No. Duct tape adhesive dries out and fails within months. It leaves a sticky residue that’s hard to clean. Use only butyl or acrylic tape designed for polyethylene. These tapes remain flexible and sticky for the life of the building.
How long does the tape last?
Quality butyl tape offers long-lasting durability. It doesn’t dry out like rubber-based adhesives. Acrylic tape also has a long lifespan. Ensure you buy tape rated for construction use. Consumer-grade tapes often fail sooner due to lower quality adhesives.
Is it safe to tape over insulation?
Yes, if the insulation is dry and clean. Don’t compress fiberglass insulation excessively. The tape should stick to the plastic facing or the polyethylene sheet. Ensure no loose fibers interfere with the bond. Smooth the plastic flat against the insulation first.
What happens if I miss a spot?
Moisture will enter the wall cavity at that spot. This can lead to mold and rot over time. Small gaps are less critical than large ones, but all should be sealed. Inspect your work carefully before closing the walls. Patch any missed areas with new tape.
Does temperature affect adhesion?
Yes. Most tapes need temperatures above 40°F to stick well. Cold tape is stiff and doesn’t flow into the plastic. Warm the tape and the surface if working in cold conditions. Check the manufacturer’s specifications for minimum application temperatures.
How wide should the overlap be?
Overlap polyethylene sheets by at least six inches. This provides enough surface area for the tape to hold securely. Narrower overlaps risk peeling if the plastic shifts. Six inches is the standard recommended by most builders and code officials.
Next steps for sealing
Start by cleaning your polyethylene sheets with a dry cloth. Apply butyl tape to six-inch overlaps, pressing firmly with a roller. Expect a smooth, airtight seal that lies flat against the wall. If the tape lifts or bubbles, peel it back and reapply it immediately.