Clean the surfaces, cut the tape, apply firm pressure, and test continuity.
If you want a fast, reliable way to bond and ground parts without solder, this guide is for you. I will show you how to use electrically conductive adhesive transfer tape like a pro, from prep to pressure to proof. You will learn the exact steps, smart design tips, and hard-won lessons I use in labs and on production floors to get stable, low-resistance connections that last.
What is an electrically conductive adhesive transfer tape?
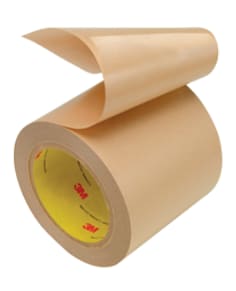
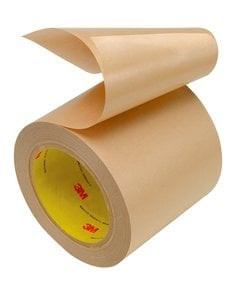
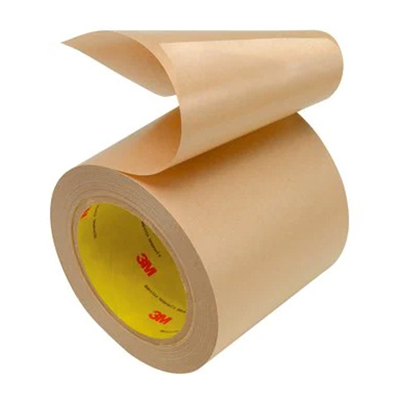
Electrically conductive adhesive transfer tape is a thin film of pressure sensitive adhesive loaded with conductive particles. It has no carrier layer. You get adhesive on a release liner, and the adhesive itself is the conductor. When you press it between two conductive surfaces, the particles form paths for current.
Most versions conduct in the Z axis. That means current flows through the thickness to make pad-to-pad contact. Many also conduct in the X and Y plane across the surface, but that varies by product. Always read the datasheet to confirm if it is Z-axis only or isotropic.
It is not the same as foil tape. Foil tape uses a metal foil with an adhesive on one side. Transfer tape has no foil. It gives a lighter, more conformal bond with less thickness and can join tiny pads or fine-pitch parts. It is often used for EMI shielding, grounding, flex-to-board bonds, touch sensors, and wearables.
If you came here to learn how to use electrically conductive adhesive transfer tape, you are in the right place. We will cover steps, tools, tests, and tricks that boost yield and cut rework.
5 Best Tape for Cold Temperatures : Top Durable Picks Tested & Reviewed
When and why to use it
Use electrically conductive adhesive transfer tape when you need a fast, clean, room-temperature bond that passes current. It shines where solder is risky or not possible. Think heat-sensitive parts, thin foils, films, and flex circuits.
Key benefits:
- Low-temperature assembly and no flux cleanup
- Thin bond lines and even pressure across odd shapes
- Good EMI and ESD paths with stable contact resistance
- Reworkable with controlled heat and slow peel
Know the limits:
- Not for high current or high heat like reflow ovens
- Conductivity depends on pressure, area, and surface finish
- Risk of galvanic corrosion with aluminum or steel in humidity
- Edges can wick moisture if not sealed in harsh use
Common uses:
- Bonding EMI shields and grounding tabs to chassis
- Mounting sensors and antennas without solder
- Making low-profile ground points on glass or plastic with ITO
- Flex-to-PCB interconnects and LED strip terminations
- Repair work where a quick, clean conductive bond is needed
As you learn how to use electrically conductive adhesive transfer tape, match your need to the right product spec. Look for sheet resistance, contact resistance, adhesion, and temperature rating.

Tools, materials, and prep
You do not need a full lab to get pro results. A small kit will do.
Tools I keep on the bench:
- Nitrile gloves to avoid skin oils on bond areas
- Tweezers and scissors or a precision knife
- A small hard roller or a burnishing tool
- Lint-free wipes and 99 percent IPA or a 50 to 70 percent IPA and water mix
- A clean cutting mat and a straight edge
- A heat gun or platen set to 40 to 60°C for tough bonds
- A digital multimeter with sharp probes or clips
Surface prep makes or breaks the bond:
- Clean both sides with IPA. Wipe in one direction. Let dry.
- Avoid silicones, oils, and mold release. They kill adhesion.
- Light abrasion on metals can help. Use a fine pad, then clean again.
- Aim for flat, firm contact. If the part flexes, add strain relief.
Environmental tips:
- Work at 68 to 77°F and 40 to 60 percent RH
- Keep dust down. Cover cleaned parts until use.
- Store tape flat, in the bag, at room temp. Mind the shelf life.
These basics are the heart of how to use electrically conductive adhesive transfer tape well. Prep is step zero.

Step-by-step: how to use electrically conductive adhesive transfer tape
Follow this simple path. It works for small patches and long runs.
- Plan the joint
Mark the bond area. Make sure both mating surfaces are conductive where they touch. Add extra area for strain relief if wires or flex move. - Cut on the liner
Leave the release liner on. Cut to size with a sharp blade or scissors. Rounded corners reduce edge lift. - Place and tack
Peel one liner if there are two. Align the adhesive to the first surface. Lightly tack it down without trapping air. - Roll on pressure
Use a hard roller or tool. Apply firm, even pressure. Target about 15 to 30 psi. Press in multiple directions. - Mate the second surface
Remove the top liner. Align and place the second part. Roll again with the same pressure. Press edges well. - Warm to speed strength
If allowed, warm the joint to 104 to 140°F for a few minutes. It helps flow and wet-out. Do not overheat. - Let it dwell
Peak bond builds over 24 to 72 hours at room temp. If your schedule is tight, plan tests after at least one hour. - Verify continuity
Use a multimeter in ohms mode. Probe near the joint on both parts. Expect low ohms. Press lightly to avoid reading probe contact, not joint contact. - Strain relief and seal
If the joint sees flex or moisture, add a mechanical clip, tape over the edge, or a sealant bead on exposed edges.
This process is the core of how to use electrically conductive adhesive transfer tape on real builds. Keep it clean, aligned, and pressed.
Testing the bond and conductivity
A quick test now saves days later. I like a two-step check.
Start with a basic continuity test. Measure resistance from one side of the joint to the other. Values depend on area and pressure. A good joint sits in the milliohm to low-ohm range per connection. Repeat three times and log the spread.
Level up with a contact resistance test on coupons that match your stack. Use the same metals and finish. Press and hold with the same tool and pressure. If you can, measure before and after a mild heat and humidity soak. Contact that drifts fast will likely fail in the field.
For EMI work, test shielding. Close the seam, then sweep with a near-field probe or test in a small box rig. Look for drop in peaks. This is a fast way to confirm a clean ground path.
Can I solder onto conductive transfer tape?
Not recommended. Heat degrades the adhesive and can raise resistance. Use a mechanical fastener or a solderable pad connected by the tape.
How much current can it carry?
It is for signals, grounds, and shielding, not high current. Large areas carry more, but check the datasheet and design with margin.
Will it work on painted metal?
Only if you expose bare conductive spots under the tape. Paint blocks current. Add masked pads or remove paint at the bond area.
When you focus on how to use electrically conductive adhesive transfer tape for stable results, test early and often. It pays off.
Design tips, compatibility, and durability
Design choices decide if the bond stays solid.
- Pick friendly finishes. Gold, nickel, tin, and copper bond well. Avoid heavy oxide layers. Clean right before assembly.
- Mind galvanic pairs. Silver-filled adhesives can attack aluminum in humid air. Use a barrier layer, choose a matching finish, or seal edges.
- Use enough area. Resistance drops as area grows. If space is tight, increase pressure or add two parallel joints.
- Control movement. If cables tug, add clips or route strain away from the joint.
- Seal edges in harsh use. A thin bead of compatible sealant reduces moisture creep.
- Match thickness. Thicker adhesive helps conform to rough parts but can raise resistance. Pick the thinnest that still wets both sides.
- Keep heat in range. Most tapes handle about -40 to 185°F. For higher heat, seek specialty grades.
These are vital parts of how to use electrically conductive adhesive transfer tape in products that face shock, sweat, and time.
Common mistakes and how to fix them
I have made these mistakes so you do not have to.
- Touching bond areas with bare hands
Skin oil kills adhesion. Wear gloves and handle edges only. - Trapping air under the tape
Bubbles raise resistance. Roll from the center out with steady pressure. - Bonding to paint or oxide
Non-conductive films block current. Expose clean metal pads first. - Not enough pressure
Light finger taps are not enough. Use a roller and target 15 to 30 psi. - Skipping dwell time
Adhesion builds over a day or two. If you must test fast, recheck later to confirm stability.
Rework tips:
- Warm the joint to 104 to 140°F. Peel slow and flat.
- Remove residue with IPA or a gentle adhesive remover. Clean and dry.
- If pads lift, switch to a lower-tack grade or add mechanical support.
Master these fixes, and you will master how to use electrically conductive adhesive transfer tape under real-world pressure.

Real-world examples and lessons learned
Grounding a shield can in a handheld device
We had EMI peaks near 500 MHz. Soldering warped the thin can. We switched to conductive transfer tape around the rim and pressed at 25 psi. Peaks dropped, and the can stayed flat. Lesson learned: even pressure beats spot solder for thin shields.
Bonding a flex sensor to a glass panel
Heat cracked the glass in trials. Conductive transfer tape made a clean bond to ITO. We sealed edges with a thin clear bead. The touch response was stable. Lesson learned: seal edges on glass to block moisture drift.
Adding a ground path in a metal enclosure
A painted case had no solid ground. We cleared small paint pads and joined with tape. Resistance was low and stable after humidity tests. Lesson learned: expose bare metal, then tape.
These stories sum up how to use electrically conductive adhesive transfer tape with care, speed, and confidence.
Frequently Asked Questions of how to use electrically conductive adhesive transfer tape
What is the best way to store the tape?
Keep it in the sealed bag at room temperature and moderate humidity. Store flat and out of sunlight to protect the adhesive.
How do I measure if the joint is good?
Use a multimeter across the joint and log the value. Repeat after 24 hours to confirm it stays low and stable.
Can I use it on flexible parts?
Yes, but add strain relief so the joint does not flex at the bond line. A clip or extra tape layer helps.
Does it work for RF and EMI shielding?
Yes, when it makes a low-impedance path to ground and closes gaps. Test with probes or in a small chamber to confirm.
How long does the bond last?
With clean surfaces and sealed edges, bonds last for years. Heat, moisture, and movement shorten life, so design with margin.
Is it safe for skin-contact wearables?
Many grades are not rated for direct skin contact. Use an over-layer or choose a medical-grade option.
What if the measured resistance is higher than expected?
Increase pressure, enlarge the contact area, or prepare the surfaces better. If it stays high, select a more conductive grade.
Conclusion
You now know how to use electrically conductive adhesive transfer tape from prep to proof. Clean the parts, cut on the liner, press with real pressure, and test for low, stable resistance. Plan for area, strain, and moisture, and you will get strong, quiet grounds and shields without heat.
Try one small joint today and measure it tomorrow. Build your own cheat sheet for pressure, time, and finish. If you found this helpful, subscribe for more build guides, or leave a comment with your toughest tape problem—I am happy to help.