A tape dispenser holds, cuts, and guides tape, making sealing, wrapping, and everyday repairs faster and neater.
A good tape dispenser is a small tool with a big role. It can save time, reduce waste, and create clean tape lines in offices, homes, classrooms, craft rooms, and shipping areas. This guide explains how a tape dispenser works, which types fit different jobs, how to choose one, and how to use it safely.
What Is a Tape Dispenser?
A tape dispenser is a tool that stores a roll of tape and helps you pull, measure, and cut it. Most models have a spindle for the roll, a guide for smooth feeding, and a sharp or serrated cutting edge.
The simple design solves a common problem. Instead of searching for the tape end and tearing it by hand, you can cut a neat piece in seconds. Some models are small enough for a desk, while others are built for heavy shipping boxes.
A tape dispenser may work with:
• Clear office tape
• Masking tape
• Packing tape
• Duct tape
• Double-sided tape
• Washi tape
• Strapping tape
• Label and specialty tapes
The right tool depends on the tape width, tape strength, and job type. A small desktop tape dispenser is ideal for notes and crafts. A handheld packing tape dispenser is better for sealing cartons.
How Does a Tape Dispenser Work?
A basic tape dispenser uses a spindle to hold the tape roll in place. The tape moves across a guide and reaches a cutting blade or serrated edge. When you pull the tape to the desired length, pressing it against the cutter separates it from the roll.
Most dispensers rely on a few key parts:
• Spindle: Holds the tape roll and lets it turn.
• Frame: Supports the tool and keeps the parts aligned.
• Tape guide: Helps the tape move in a straight path.
• Cutter: Cuts or tears the tape.
• Base or handle: Provides stability and control.
• Brake or tension arm: Helps control how quickly tape unwinds.
A weighted desk model stays in place while you pull the tape with one hand. A handheld model uses your grip and a built-in roller to press tape onto a box before cutting it.
Think of a tape dispenser as a small traffic system. The spindle controls movement, the guide keeps the tape on course, and the cutter ends the trip cleanly.
The Ultimate Tape Selection Guide: How to Choose the Right Tape for Any Job
Common Types of Tape Dispensers
Choosing the correct type makes a clear difference in speed, comfort, and tape use. Each tape dispenser style has a specific purpose.
Desktop Tape dispenser
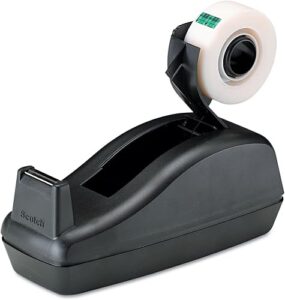
A desktop tape dispenser is made for light tasks. It usually has a weighted base and a short cutting edge. You can use it for wrapping gifts, attaching notes, labeling items, and sealing envelopes.
This type works best with narrow rolls of clear tape. It is easy to operate with one hand and stays ready on a desk or counter.
Handheld Packing Tape Dispenser
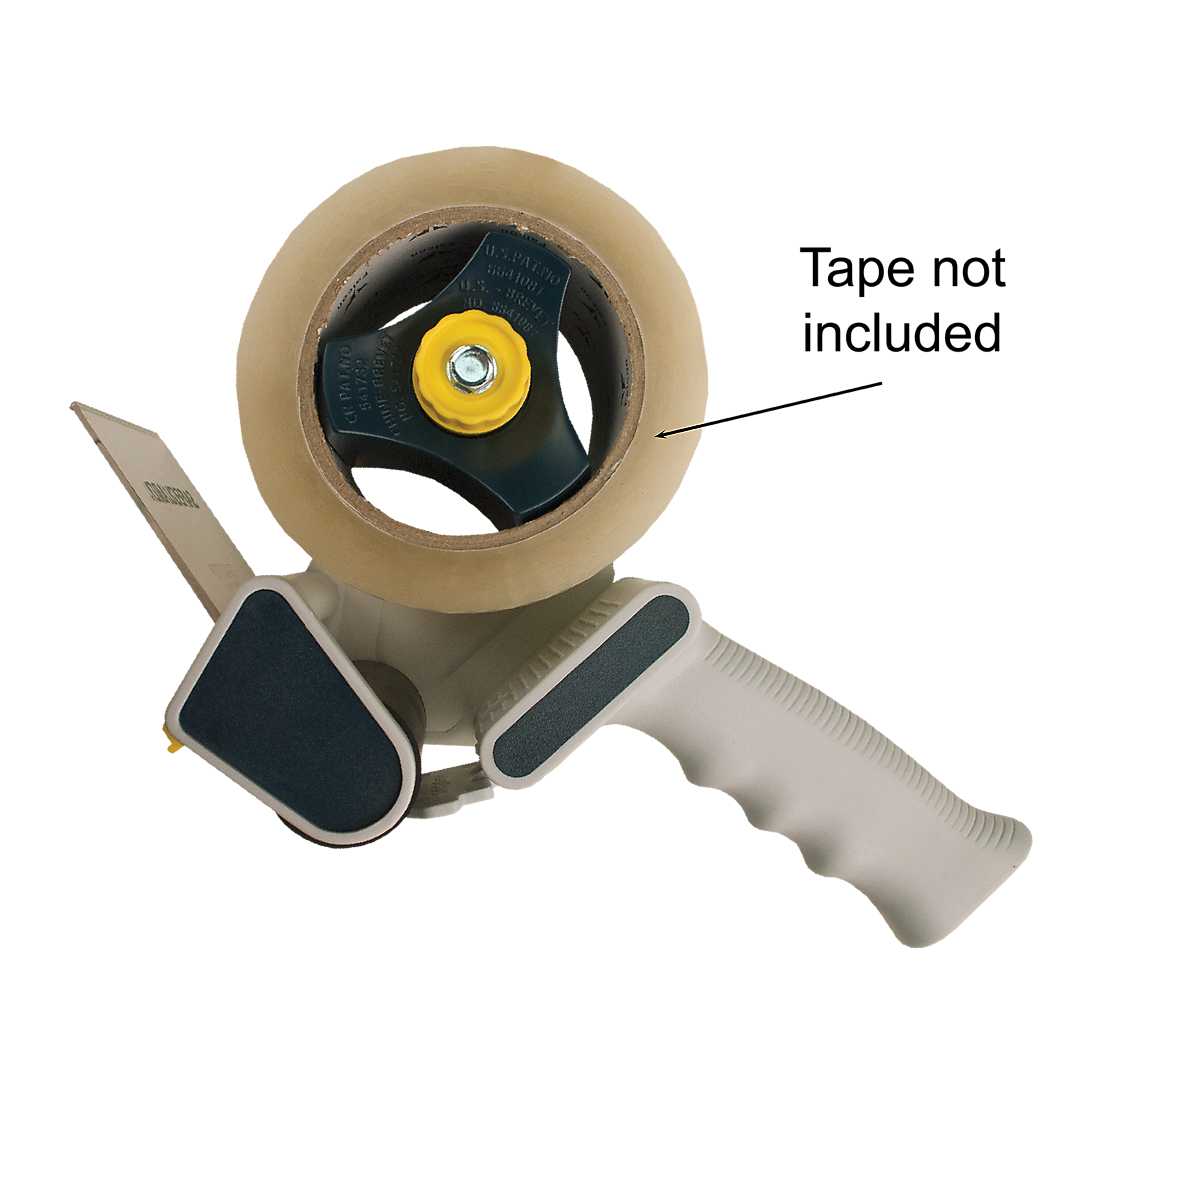
A handheld packing tape dispenser is common in warehouses, offices, and homes. It usually holds wide packing tape, often around 2 inches wide. A roller presses the tape onto the box, while a metal blade cuts it.
This design improves packing speed. It also helps keep the tape flat and reduces loose ends.
Pistol-Grip Tape Dispenser
A pistol-grip tape dispenser has a curved handle that supports repeated use. It often includes an adjustable brake, which lets you control tape tension.
This model is helpful when sealing many boxes. The handle can reduce hand strain compared with pulling tape directly from a loose roll.
Carton Sealing Machine
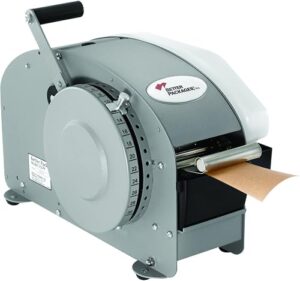
A carton sealing machine is a larger tool for high-volume packing. It may apply and cut tape automatically or semi-automatically.
These machines cost more and need more space. They make sense for businesses that seal many cartons each day, but they are usually unnecessary for home use.
Specialty Tape Dispenser
Specialty models support tapes with unusual shapes, widths, or materials. Examples include double-sided tape dispensers, label dispensers, and dispensers for medical or industrial tape.
Before buying one, check the product specifications. A dispenser made for thin office tape may not handle thick adhesive tape well.
Benefits of Using a Tape Dispenser
A tape dispenser is more than a convenience tool. It can improve work quality and reduce small sources of waste.
Faster Work
A tape dispenser lets you pull and cut tape with fewer steps. This matters when you seal many envelopes, wrap gifts, or prepare shipping boxes.
In a busy packing area, saving even a few seconds per box can add up. The tool becomes part of a smooth work rhythm.
Cleaner Tape Application
A dispenser helps you cut tape to a straight, usable edge. It also keeps the tape aligned as you apply it.
Clean edges matter for packages, labels, crafts, and presentation. A neat tape line can make a handmade project or shipment look more professional.
Less Tape Waste
Loose tape rolls often stick to themselves or get folded. A tape dispenser reduces that problem by keeping the roll organized and easy to control.
You still need to pull only the length you need. The dispenser cannot prevent waste caused by poor measuring or repeated mistakes.
Better Hand Control
A good tool reduces the need to pinch, pull, and tear tape with your fingers. This can make repeated tasks more comfortable.
A weighted base is useful for one-handed work. A padded handle may help when sealing many boxes.
Improved Safety
A tape dispenser keeps the cutting edge in a predictable place. That is safer than using scissors, knives, or teeth to cut tape.
The blade still needs care. Keep fingers away from the cutting edge, and store the tool where children cannot reach it.
How to Choose the Best Tape Dispenser
The best tape dispenser is not always the most expensive one. Match the tool to your tape and daily work.
Check Tape Width and Core Size
Start with the tape itself. Measure its width and check the inside diameter of the roll core.
Many office models use narrow tape. Packing dispensers often use wider rolls. If the roll does not fit the spindle, the dispenser will not work well.
Consider Daily Use
Ask how often you will use the tool.
• Occasional home use: Choose a simple desktop model.
• School or craft use: Choose a stable model with a safe cutter.
• Small business packing: Choose a handheld carton sealer.
• High-volume shipping: Consider a durable industrial model.
A heavy tool may feel unnecessary for a few pieces of tape each day. A light plastic model may fail under constant commercial use.
Look for a Stable Base
A weighted base prevents the dispenser from sliding. Rubber feet can improve grip on smooth desks and counters.
Stability is especially useful when you want to pull tape with one hand. A tool that moves too much can waste tape and cause uneven cuts.
Examine the Cutter
The cutter should separate tape without crushing or stretching it. Serrated edges are common because they grip many tape types.
A dull cutter may leave torn edges and force you to pull harder. Replace the dispenser if the blade becomes unsafe or cannot cut properly.
Consider Comfort
For handheld models, look for a handle that fits your grip. The trigger and brake should work without excessive force.
Comfort matters more than it may seem. Awkward tools can cause fatigue during repeated packing tasks.
Review Materials and Durability
Plastic dispensers are light and often affordable. Metal parts can improve strength, especially in the cutter, spindle, and frame.
A mixed design can offer a useful balance. For example, a plastic body with a metal cutter may work well for normal home and office use.
Tape Dispenser Features Worth Paying For
Some features add real value, while others may not matter for simple tasks.
Adjustable Tape Tension
A tension control or brake lets you decide how freely the roll unwinds. Low tension helps tape move quickly. Higher tension can improve control on heavy cartons.
This feature is useful when working with different tape materials. Thin tape may need gentle handling, while thick packing tape may need more resistance.
Replaceable Blades
A replaceable blade can extend the life of a tape dispenser. It is useful for workplaces where the tool is used every day.
Check whether replacement parts are easy to find. A replaceable part has little value if it is costly or unavailable.
Built-In Tape Guides
Tape guides help prevent sideways movement. They are helpful when applying tape along a box seam or a straight craft line.
A guide is especially useful for beginners. It makes the tool feel more controlled and predictable.
Non-Slip Feet
Rubber feet help a desktop dispenser stay in place. They also protect the surface from scratches.
This small feature can make one-handed use much easier. It is worth checking when comparing similar models.
Multiple Roll Capacity
Some dispensers hold two or more rolls. This can save space for people who use different tape types during the same project.
However, a larger model may take up more room. Choose this feature only if you will use it often.
How to Use a Tape Dispenser Correctly
Using a tape dispenser is simple, but a few habits improve results.
- Place the tape roll on the spindle with the adhesive side facing the correct direction.
- Pull the tape through the guide if the model has one.
- Leave a small tape end outside the dispenser.
- Hold the dispenser steady or grip the handle firmly.
- Pull the tape to the needed length.
- Press the tape against the cutter.
- Lift or pull away smoothly.
- Press the applied tape down to remove bubbles or loose edges.
When sealing a box, center the tape over the seam. Press the tape onto the top panel first, then guide it across the seam and down the other side.
For better carton strength, many packing professionals use the H-taping method. This places tape along the center seam and across the two open edges. The correct method depends on the box design, weight, and shipping conditions.
How to Load a Tape Dispenser
Loading a tape dispenser incorrectly can cause poor cutting and uneven tape flow.
For a Desktop Dispenser
- Remove the empty roll or spindle cap.
- Place the new roll on the spindle.
- Make sure the tape unwinds in the direction shown by the design.
- Pull the tape toward the cutter.
- Cut a short starter piece if needed.
The adhesive side should usually face down when the tape moves toward the cutting edge. If the tape feeds backward, remove the roll and turn it around.
For a Handheld Packing Dispenser
- Open the roll holder or slide the roll onto the axle.
- Check the direction of the tape.
- Pull the tape under or around the guide roller.
- Leave the adhesive side ready to contact the box.
- Test the tool on scrap cardboard.
A quick test can reveal loading problems before you begin packing real products. This small step prevents wasted tape and frustrating rework.
Common Tape Dispenser Problems
Even a strong tape dispenser can perform poorly when the tape or tool is wrong.
Tape Will Not Unwind
The roll may be loaded backward, stuck to the spindle, or pressed too tightly against the frame. Remove the roll and check for damaged edges.
Dust and adhesive buildup can also create resistance. Clean the spindle and guide with a dry cloth.
Tape Tears Too Soon
The cutter may be too sharp for a thin tape, or the user may be pulling at a steep angle. Try pulling the tape straight and using less force.
If the tape tears before reaching the cutter, inspect the roll for creases or splits.
Tape Does Not Cut Cleanly
A dull or bent blade is a common cause. Thick tape may also need a stronger cutter than the dispenser provides.
Do not force the tape against a damaged blade. Replace the blade or use a dispenser rated for that tape.
The Dispenser Slides
A light base or smooth surface may cause movement. Add a non-slip pad or choose a model with rubber feet and more weight.
For frequent work, a stable tool is usually worth the small extra cost.
Tape Sticks to the Tool
Adhesive can collect around the guide or cutter. Turn the tool upside down and remove residue carefully with a dry cloth.
Follow the care instructions for the product. Strong solvents may damage plastic parts.
Maintenance and Cleaning Tips
Basic care helps a tape dispenser last longer and work more smoothly.
• Remove dust and loose adhesive each week during regular use.
• Keep the cutter dry and free from paper scraps.
• Store the dispenser away from heat and direct sunlight.
• Do not overload the spindle with a roll that is too wide.
• Replace damaged blades instead of forcing tape through them.
• Keep the tool covered in dusty workshops or storage rooms.
For sticky residue, start with a dry cloth. If the manufacturer allows it, use a small amount of isopropyl alcohol on a cloth, not directly on the tool. Test it on a hidden area first because some plastics can become cloudy or brittle.
A useful lesson from repeated packing tests is that most failures come from poor cleaning or wrong tape size, not from the basic design. A minute of care can prevent a full day of annoying tape problems.
Tape Dispenser Safety
A tape dispenser is safer than many improvised cutting methods, but it still contains a blade.
Keep fingers behind the cutting edge. Never carry a handheld packing dispenser by the blade or leave it under loose paper. Store it in a dry place away from children and pets.
Use the dispenser only with compatible tape. Do not try to cut wire, plastic straps, fabric, or other materials unless the manufacturer says it is designed for them.
When working in a warehouse, follow workplace safety rules and wear suitable protection. A dispenser should support safe packing habits, not replace them.
Tape Dispenser vs. Scissors and Tape Guns
Each tool has strengths.
| Tool | Best for | Main advantage | Main limitation |
|---|---|---|---|
| Desktop tape dispenser | Office tasks and crafts | Fast one-handed use | Holds only certain roll sizes |
| Handheld tape dispenser | Packing boxes | Applies and cuts tape quickly | Needs safe handling |
| Scissors | Precise cuts and many materials | Flexible and familiar | Slower for repeated sealing |
| Utility knife | Thick materials | Strong cutting power | Higher injury risk |
| Automatic dispenser | High-volume work | Fast, consistent lengths | Higher cost and maintenance |
A tape dispenser is often the best choice when you need speed and repeatable cuts. Scissors may be better for detailed craft work, while a utility knife is better for materials the dispenser cannot handle.
Practical Tips for Better Results
Small changes can make tape work faster and cleaner.
• Keep one dispenser near each main work area.
• Use a tape width that matches the box or project.
• Pull tape in a straight line instead of at an angle.
• Press tape down as you apply it to prevent bubbles.
• Test unfamiliar tape on scrap material first.
• Replace rolls before they become difficult to grip.
• Label dispensers if several tape types look alike.
• Use a weighted model for shared office spaces.
One common mistake is buying a dispenser based only on price. A low-cost tool may work well for occasional use, but it may frustrate you if it slips, jams, or breaks during daily packing.
Another mistake is forcing a large roll into a small dispenser. The tape may rub against the frame, which increases drag and can damage both the tool and the roll.
Frequently Asked Questions About Tape Dispensers
What is a tape dispenser used for?
A tape dispenser holds a roll of tape and helps you pull and cut it. People use it for office work, crafts, gift wrapping, labeling, and shipping boxes.
Can any tape fit in a tape dispenser?
No. Dispensers support specific tape widths, roll diameters, and core sizes. Check the product specifications before buying or loading a new roll.
How do you keep tape from sticking to the dispenser?
Keep the guide and cutter clean, and use the correct tape size. Remove adhesive residue with a suitable cloth or approved cleaner, and avoid storing the tool in high heat.
Is a tape dispenser safer than scissors?
A tape dispenser can reduce the need to use scissors or teeth, but its cutter still has a sharp edge. Use it with care and keep fingers away from the blade.
Why does my tape dispenser keep jamming?
The roll may be loaded backward, too wide, damaged, or pressed against the frame. A dirty guide or dull cutter can also cause jamming.
What is the best tape dispenser for shipping boxes?
A handheld packing tape dispenser with a strong roller, comfortable handle, and reliable cutter is usually the best choice. For high-volume work, an industrial or automatic carton sealing machine may be more efficient.
How do you clean a tape dispenser?
Remove the tape roll and wipe dust from the spindle, guide, and frame. For adhesive residue, use a cleaner approved for the tool’s materials and test it in a hidden spot first.
Conclusion
A tape dispenser makes simple tape jobs faster, cleaner, and easier to control. The best choice depends on your tape size, work volume, cutting needs, comfort, and available space.
For occasional tasks, a stable desktop model is often enough. For shipping, choose a handheld carton dispenser with a comfortable grip and strong cutter. Load the tape correctly, clean the tool often, and always treat the blade with care.
Choose a tape dispenser that matches your real needs, then put these tips into practice. Explore related packing and office tools, and share your own tape-saving tips in the comments.